Product photographs are one of the key things to take into account if you run an online business. The image of your product is the first thing that catches the customer’s eye when browsing through the product’s webpage. Consequently, appealing product photographs will assist you in increasing sales. What’s more, great photos minimize uncertainty and allow buyers to better examine the product, that reduces the risk of mistakes and the percentage of returns.
Hiring a professional photographer to picture your items might be quite pricey. Creating high-quality product images on your own, on the other hand, doesn’t necessarily require huge sums of money or high-end equipment. In this article, we’ll discuss what equipment you need to create great product photos for your online business.
1. Use a Good Camera
First, you’ll need a good-quality camera to take pictures of your products. Whether it’ll be a professional camera or a smartphone depends on your needs and budget.
Professional cameras are an excellent choice if you’re an experienced photographer or require high-resolution images for printing posters and banners, not just uploading them to a website. Because they frequently have more powerful capabilities than smartphones. To make it easier to decide which professional camera to choose, check out the article about the best cameras for product photography.
If you’re on a tight budget or are new to photography, on the other hand, a smartphone is a great option. Moreover, a smartphone camera might be more appropriate if you intend to use the product images only on digital resources. Since social networking sites often reduce the resolution of submitted photographs, there’s no need for high-quality images produced by professional cameras.
2. Purchase a Tripod
A tripod helps avoid the camera shake that usually occurs when shooting handheld. This improves the focus and consistency of your product shots, whether you’re using a smartphone or a digital camera. Since a tripod provides excellent stabilization, it allows you to use slower shutter speeds, which means you can shoot products in low light without any trouble.
There are several kinds of tripods to choose from depending on your needs:
• Travel tripod. It is a great option if the sizes of your products differ. During shooting, you can stretch it to its maximum height to capture larger things (such as furniture, rugs, or appliances) and shrink it to photograph smaller things (like jewelry, stationery, etc.).
• Tabletop tripod. This option will work best if your products are mostly small and can fit on the table. Plus, it has flexible legs that can help you set any angle you want.
3. Illuminate Your Product
Proper lighting is another aspect of taking a good-quality product photo. The product in the picture should be free of excessively bright or dark areas. Plus, there should be proper color reproduction, and nothing that happens behind the scenes should be reflected in the product. The solution here is to use a professional full-spectrum lamp.
4. Choose the Right Backdrop
In addition to focusing on the product itself, it is also important to create a pleasing aesthetic presentation around it. A good background can help to cope with this. Backdrops are classified into two types: solid color and contextual.
As for a solid color backdrop, it should be smooth and blend seamlessly with your surface. Both for accurate color reproduction and for easy post-processing photographers tend to use a white backdrop. Check out the professional background options and choose the one that’s right for you. If there was no white background nearby during the photoshoot, no worries. You can fix that during post-production. Find out how to add a white background to photos by following this link.
You still can use a color different from white. But keep in mind that it will reflect on the subject and alter its real color. For example, a black backdrop will perfectly match the gold color of the jewelry as it balances its shine and adds elegant vibes.
As for contextual backdrops, this should be understood as the usage of a real-life setting during shooting. It allows customers to visualize how they use the product in their daily lives.
For example, a ski equipment brand can conduct a shoot in the snowy mountains to demonstrate its products in action.
5. Utilize Props If Necessary
Props like mannequins are necessary if you sell jewelry or clothing. Compared to hiring models, it costs a lot less. The mannequin may also be used to recreate one pose for a series of photos.
As for jewelry, you can buy a tiny statue of a hand and wrist for rings and bracelets. As for clothing, it doesn’t have to be a full-length mannequin unless you want to show the outfits assembled.
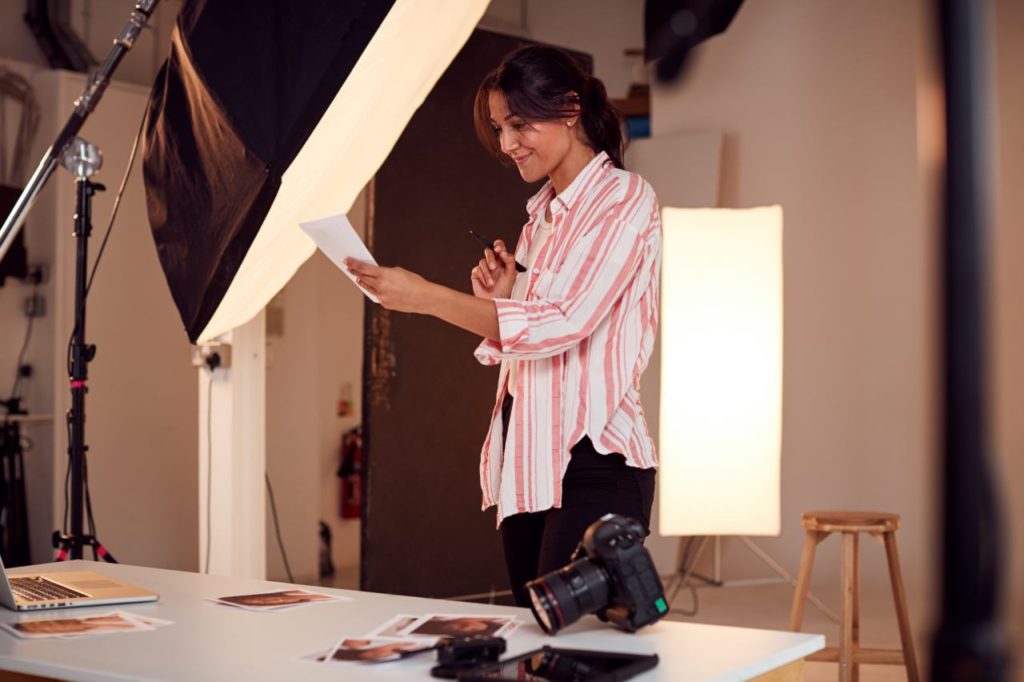
6. Set Up Your Shooting Space
Once you have all the equipment ready, all you have to do is to put it all together and create a mini-studio. Set up your shooting area in your office or home where you don’t have to move anything around. In order to shoot comfortably, if the products you sell are small, you’ll also need a table on which you install all the necessary equipment we’ve mentioned above.
Wrapping Up
We hope this article will help you set up your shooting area to take great photos of your products, and it’ll make your online business rise and shine against competitors!