Android is probably the most popular operating system for smartphones today. With its increasing popularity, hundreds and thousands of Android apps are released everyday on the Google Play store, the official Android apps repository.
You can find an Android app for almost anything on Google Play store. This includes Android games, productivity apps, business apps, finance apps etc. The only issue now is that these Android apps are getting more and more resource heavy with each version. So you have to spend a lot on high power Android smartphones.
There are times when you just want to test an Android app to check if its suitable for your purpose. But you can’t as it needs much more resources (RAM and processor) compared to what you have on your Android phone. But thanks to BlueStacks, you can now run an Android app on your computer (PC or Mac) easily.
BlueStacks is a software, available for both Mac and PC that lets you run an Android app on your computer. You can play Android games on your computer, and use any other Android app on computer just like you would do on your Android smartphone.
Installation and Setup of BlueStacks on Your Computer
Installing BlueStacks on your computer is very easy. Go to BlueStacks home page and download BlueStacks for the operating system you have installed on your computer. It may be Windows or Mac. Once you have the BlueStacks .exe file, double click on it and follow the on screen instructions to install it.
Important Note: If you are trying to install BlueStacks on a laptop, make sure to plug in your power cord while you install it. This is because the laptop battery may not be able to handle the power needed by graphic card while installing Bluestacks
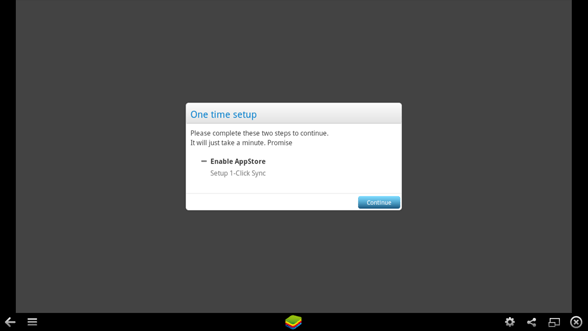
Once installed, you need to setup BlueStacks for your computer. This is one time procedure. To do this, start BlueStacks. It will immediately start downloading the Android apps database and other necessary updated features. It may take a few minutes to complete depending upon the speed of your internet connection.
Now go to ‘My Apps’ in BlueStacks and click on ‘App Search’. BlueStacks will now prompt you for one time setup where you have to select the preferred App store and enter you authentication details. There will be a list of available App stores including the Amazon App store and Google Play store. Select Google Play Store from the list. Now accept the BlueStacks Terms and login using your Google account.
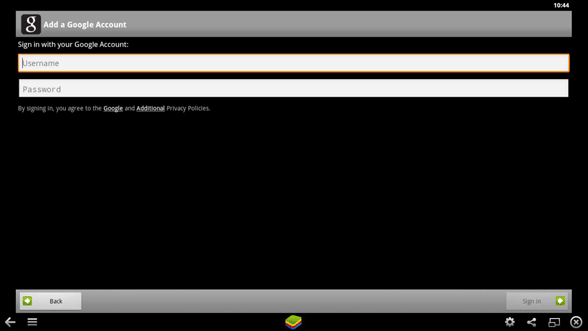
Important Note: If the password of your Google account contains special characters or capital letters, you need to use the BlueStacks virtual keyboard to enter it. You can find it at the bottom of BlueStacks window.
That’s it. Your are not ready to run an Android app on your computer.
Run Android App on Your Computer Using BlueStacks
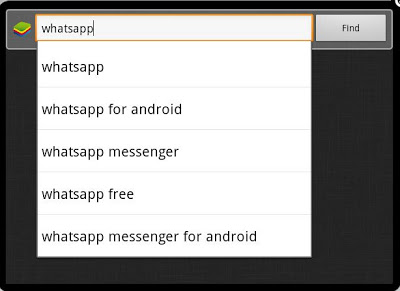
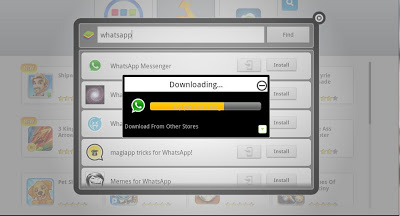
To run an Anroid app on your computer using BlueStacks, you need to first download it. To download an Android app, start BlueStacks, and click on the small search icon in the top right corner of the BlueStacks interface. Now enter the name of the android app you want to install and click on ‘Find’.
Bluestacks will now search for your Android app in all the available marketplaces and it will list them on the next screen. Select the default Google Play store here.
Note that is you want to install some rare Android app, then it may not be available at Google Play marketplace. So you will not see it in the BlueStacks search results. In this case, you can install the app from any other marketplace, but make sure that its a trusted source like Amazon Android market.
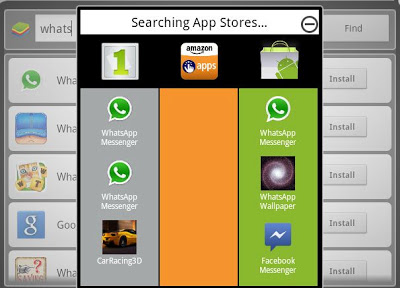
Once you select the market, you can start downloading the Android app.
Once download is complete, go to ‘My Apps’ window in BlueStacks and click on the Android app to run it on your computer. You can repeat this same procedure to download, install and run any Android app on your computer.