Many people, including teachers, office employees, YouTube content creators, travel bloggers, and others, find external hard drives ideal portable storage devices. The hard drive is not, however, impervious to harm. You must purchase a new one if it corrupts unexpectedly. The worst aspect is that you could lose access to all the information stored on such external hard drives.
In this article, we tell you the early warning signs of a failing hard drive, how to fix or repair the corrupt hard drive with or without formatting the device on Mac, and how to recover data from corrupted external hard drives using a professional data recovery tool step by step. Related: How to See All Files on Mac Hard Drive?
Part 1. Signs of External Hard Drive Corruption You Will Notice on Mac
• You are sure the cable connecting the external hard drive and Mac is in good condition, but the device is not appearing on your Mac, even after you plugged it into different USB ports.
• When you just connect an external hard drive to your Mac mini, MacBook Pro/Air, an error message appears, saying “The disk you inserted is not readable.”
• Although the hard drive can be connected to a Mac, you cannot access its contents.
Part 2. Two Methods to fix a corrupted external hard drive without formatting (on Mac)
Sometimes, an improper physical connection between the device and the computer will cause your external hard drive to not show up on Mac. You can use a different USB cable to reconnect the hard drive to your Mac, remove any USB hubs or other extensions you may be using, and try connecting the device straight to the computer instead. Additionally, you can check to see if any software updates are available in your APP Store.
If you are sure there is no problem with the IDE / SATA USB connection, you can attempt these 2 methods to fix the corrupted external hard drive on your Mac.
Method 1. Use the First Aid feature in Disk Utility to fix minor file system corruption
This Mac’s built-in program can be used to verify and resolve many issues, such as elementary errors in the external hard disk, apps quitting unexpectedly, corrupted files, corrupted external devices, etc. The procedures for using the Disk Utility tool to repair a failing Mac external hard disk are listed below:
Step 1. Use Finder, go to Applications –>choose “Utilities” -> then select “Disk Utility”.
Step 2: Choose the corrupted hard drive you plan to work on from the drives shown in the sidebar.
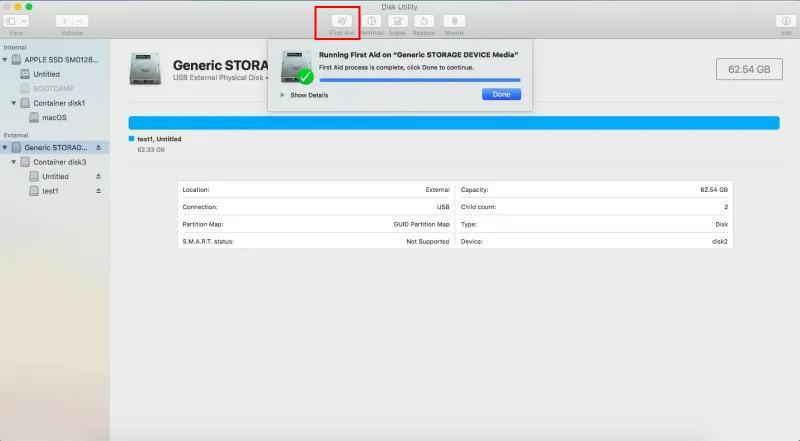
Step 3: Check the example picture below for reference; choose “First Aid” from the Disk Utility window’s top menu, and then wait for the repair process to get completed.
Method 2. Repair your external hard drive on Mac with the FSCK command
If you attempted to use Disk Utility to fix the faulty hard drive, but still cannot use it on a Mac computer, you can try another method: the FSCK command. This approach calls for more time and is a little more difficult. Here are the detailed steps:
Step 1. Go to Finder -> select “Utilities” -> then choose “Terminal” -> now type “diskutil list” for the Terminal app to list all the drives/disks that are connected to your Mac.
Step 2. Find the external hard drive you want to repair from the disk list, and then find its drive identifier (usually, you can see it on the right column, where it is shown as disk0, disk1, or disk#).
Step 3. Boot into Single User Mode on Mac in this way: restart your Mac, and hold down the “Command – S” keys until Apple logo appears.
Step 4. Some white text will begin to slide down once you enter your username and password. When it comes to a stop, type the command “/sbin/fsck -fy.” Then hit Enter.
Step 5. Now you can type in this command: “/sbin/fsck_hfs -fy /dev/[drive identifier]”. (If necessary, you can replace hfs with the file system of your portable hard drive, and replace [drive identifier] with the identifier of the external device you got with the “diskutil list” command).
Step 6. After the fsck command has successfully checked and repaired the errors in your external hard drive, you can type “reboot” into the command prompt and then press Enter to restart your Mac.
Part 3. How to repair an external hard drive on Mac by reformatting it
On Mac systems, the operation of formatting an external storage device is more commonly called “erase.” When there are bad sectors on your external hard drive, or when you can neither write in new data nor access the files on your hard drive, you might want to erase it and make it usable again. For newbies, it is simple to format an external hard drive on Mac using the Disk Utility app. Connect your external hard drive on a Mac-based computer and do as below:
Step 1: Launchpad – Other – Disk Utility, and click the “Disk Utility” app.
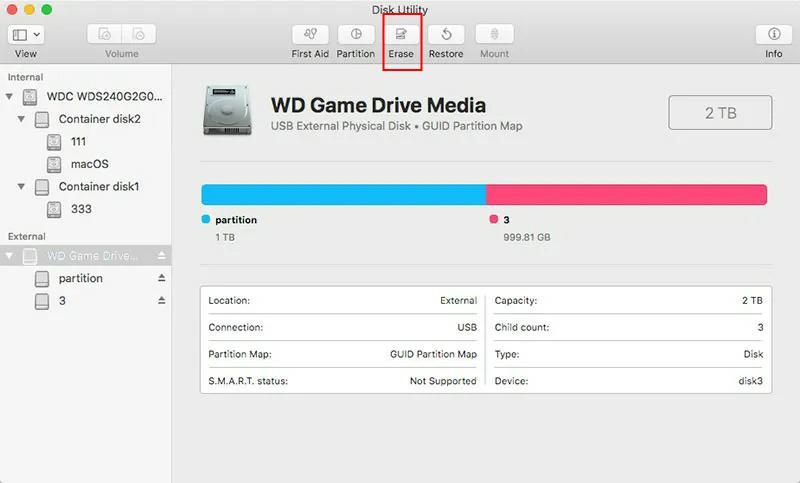
Step 2: Find the external hard drive you want to reformat, choose it, and click “Erase” on the top.
Step 3: Provide a new disk name, and choose a new format and a scheme for your external hard drive.
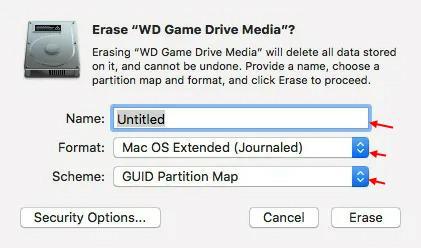
Tips: You can choose one format/file system from 10 options, including APSF, APFS (Encrypted), APFS (Case-sensitive), APFS (Case-sensitive, Encrypted), Mac OS Extended (Journaled), Mac OS Extended (Journaled, Encrypted), Mac OS Extended (Case-sensitive, Journaled) and MS-DOS (FAT).
There are 3 schemes to choose from – GUID Partition Map (it is mainly for all Intel-based Macs), Master Boot Record, and Apple Partition Map (it is suitable for old PowerPC-based Mac computers).
Step 4: Finally, click “Erase”, and the Disk Utility app will begin to format your external drive.
Please keep in mind that erasing the hard drive will immediately wipe all data on it. This operation cannot be undone.
4. How to recover lost data from corrupted external drives on Mac using the software
Suppose Disk Utility fails to repair this corrupted external hard drive; you will have to reformat the device to make it usable.
If you have already backed up all vital files from the malfunctioning external hard disk beforehand, you do not need to be concerned, simply restore your backed-up contents. But if you didn’t back up the data before the portable hard drive got corrupted, data security is a major concern.
iBoysoft Data Recovery for Mac is an easy-to-use, powerful recovery software to get back lost data from corrupted, formatted or unreadable external hard drives. Even if the Disk Utility app cannot repair the errors on your device, you still can rely on this data recovery tool to salvage your files.
Download iBoysoft Data Recovery for Mac, launch the software, connect the corrupted hard drive to your Mac, and then do as below:
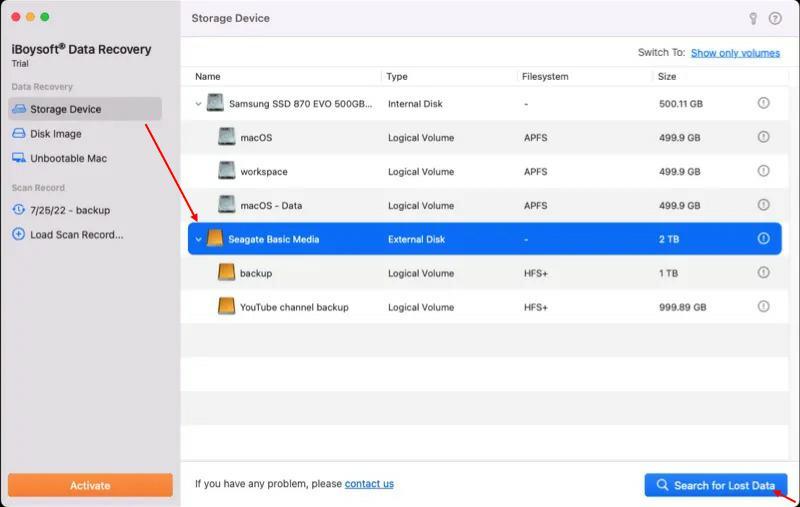
1. On the software interface, select the corrupted drive in the disk list, and click “Search for Lost Data”.
2. When the data scan process is finished, you can view files found on the corrupted external hard drive in the folder of “Quick result on HFS+” or “Complete result on HFS+”
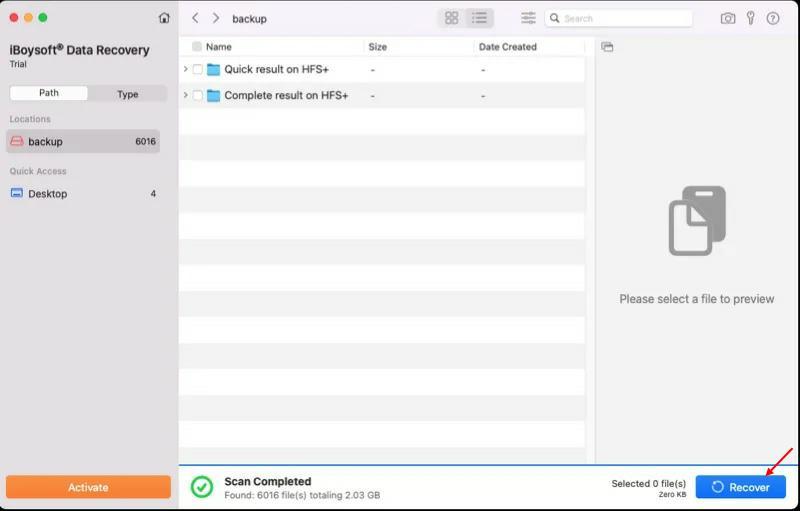
3. Preview files that can be recovered from the corrupted drive (usually the files you can preview with iBoysoftware Data Recovery can be successfully recovered on Mac), tick the box next to the file you want to restore, click the Recover button, and save it to a different, safe storage device. To avoid data overwriting, do not save the recoverable files to the corrupted external hard drive you are using.