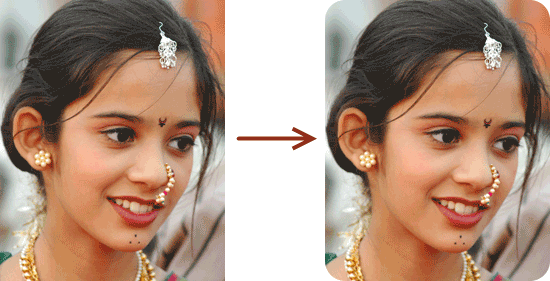
Here’s the procedure to add rounded corners to an image with Photoshop.
1. Open the image in Photoshop and create a new layer (Layer > New Layer).
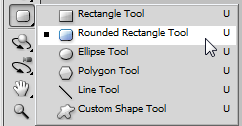
2. Now select the rounded rectangle tool from the tool box.

After selecting the rounded rectangle tool, choose the radius you want to have for the rounded corners.
![]()
3. Draw the rounded rectangle on this newly created layer. The fill color is irrelevant at this step. Just note that what’s inside this rounded rectangle will be the round cornered picture.
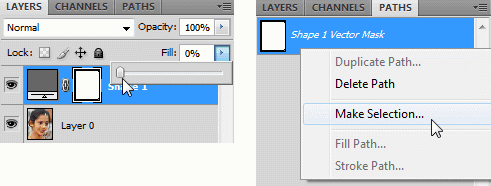
4. In the Layers palette, slide the Fill % to zero. Then click on the Paths tab, right click on the path and click on Make Selection.

In the Make Selection pop up window, keep the Feather Radius to be 0 and Anti–aliased option checked.
5. Now go to Edit > Copy Merged. Then create a new document (File > New) and paste it in it. You’ll get a nice rounded cornered image.
Thanks for the tip! I personally don’t like the look of rounded corners on photos, but it’s always nice to have the skill.
Photoshop really is awesome, and it’s one of those tools that I use multiple times every day.
Thanks again for posting!